A roundup of data-related activities in SFMC Automation Studio and how to use them
Automation Studio in Salesforce Marketing Cloud is a powerful tool that you use for ETL. What’s ETL, you might wonder? It stands for Extract, Transform, Load and refers to all kinds of activities you can do with data in the Marketing Cloud. Automation Studio’s building blocks are email sends, data extract, verification activities, and much more. You use them to create advanced automations for data management in Salesforce Marketing Cloud. Usually, the users of this studio are experienced and more technical marketers since it’s quite a responsible challenge to leverage and make use of this studio for non-technical marketing profiles. However, with this article, we would like to walk through the Automation Studio activities so that even a non-technical marketer can use this tool.
This article is a continuation of our journey through the Automation Studio. In our comprehensive Automation Studio guide, you can learn more about the studio’s segmentation activities and read about real-life use cases.
Email Send Activity
Sending emails is a part of your average marketer’s package, but sending emails through Automation Studio is a different story. Nowadays, it’s more likely to send emails using Journey Builder or a good-old Email Studio. Although, you can still use Automation Studio to send recurring email campaigns like Birthday emails. This Trailhead module explains in detail how you can do it in Salesforce Marketing Cloud.
To use Email Send Activity in Automation Studio, you need to configure the email message to send on its own or in sequence according to a schedule. Scheduling activities opens many possibilities for recurring campaigns that can be easily automated in the studio. It’s also possible to reuse email activities, so you don’t need to create a new one every time.
You can choose and configure an email message to send on its own or in sequence according to a schedule. Configuring the Send Email Activity creates a Send Definition that can be used in other automations. It’s also possible to edit the email in the running automation. You can learn more about how to do it here.
You have to keep in mind that sending emails via Automation Studio has its limitations. For instance, the test sends are better to do outside the Automation Studio. That’s because editing a user-initiated email with a test audience in Automation Studio automatically removes the test audience. It’s better to use Email Studio for these purposes.
Send email activities that were created with classic email editor inside automation are no longer editable. If you want to edit the activity, you must replace it. The send definition that each Send email activity uses for sending is still valid.
Journey Builder is more often used as an alternative for Automation Studio for email sends purposes, and it allows more reporting and tracking possibilities than Automation Studio. It’s possible to build reports in Analytics Builder or use Email Studio and then see tracking results. In contrast, Automation Studio reports are limited to opened/ clicked information, and a more detailed analysis is available if you only use SQL to extract and analyze the data.
Script Activity
If you want to use a script activity in Automation Studio, you need to use SSJS (Server-Side JavaScript). Using SSJS in Marketing Cloud opens many marketing automation possibilities, and you can also use it in emails or landing pages. This implies that you need to know how to use code, and that’s why in our article, we recommend restricting access to Automation Studio for non-Marketing Cloud admins. Salesforce Marketing Cloud shares information on how to use SSJS in its documentation base. You can use it as a reference to decide whether you want to learn this programming language or if you want to invest in hiring professionals that can help to set this up for marketing automation purposes.
Using this activity is limited to more technical colleagues and data professionals. However, if you want to delve into the more technical side of Marketing Cloud and learn more about SSJS, this excellent blog offers many use cases and guides for SSJS.
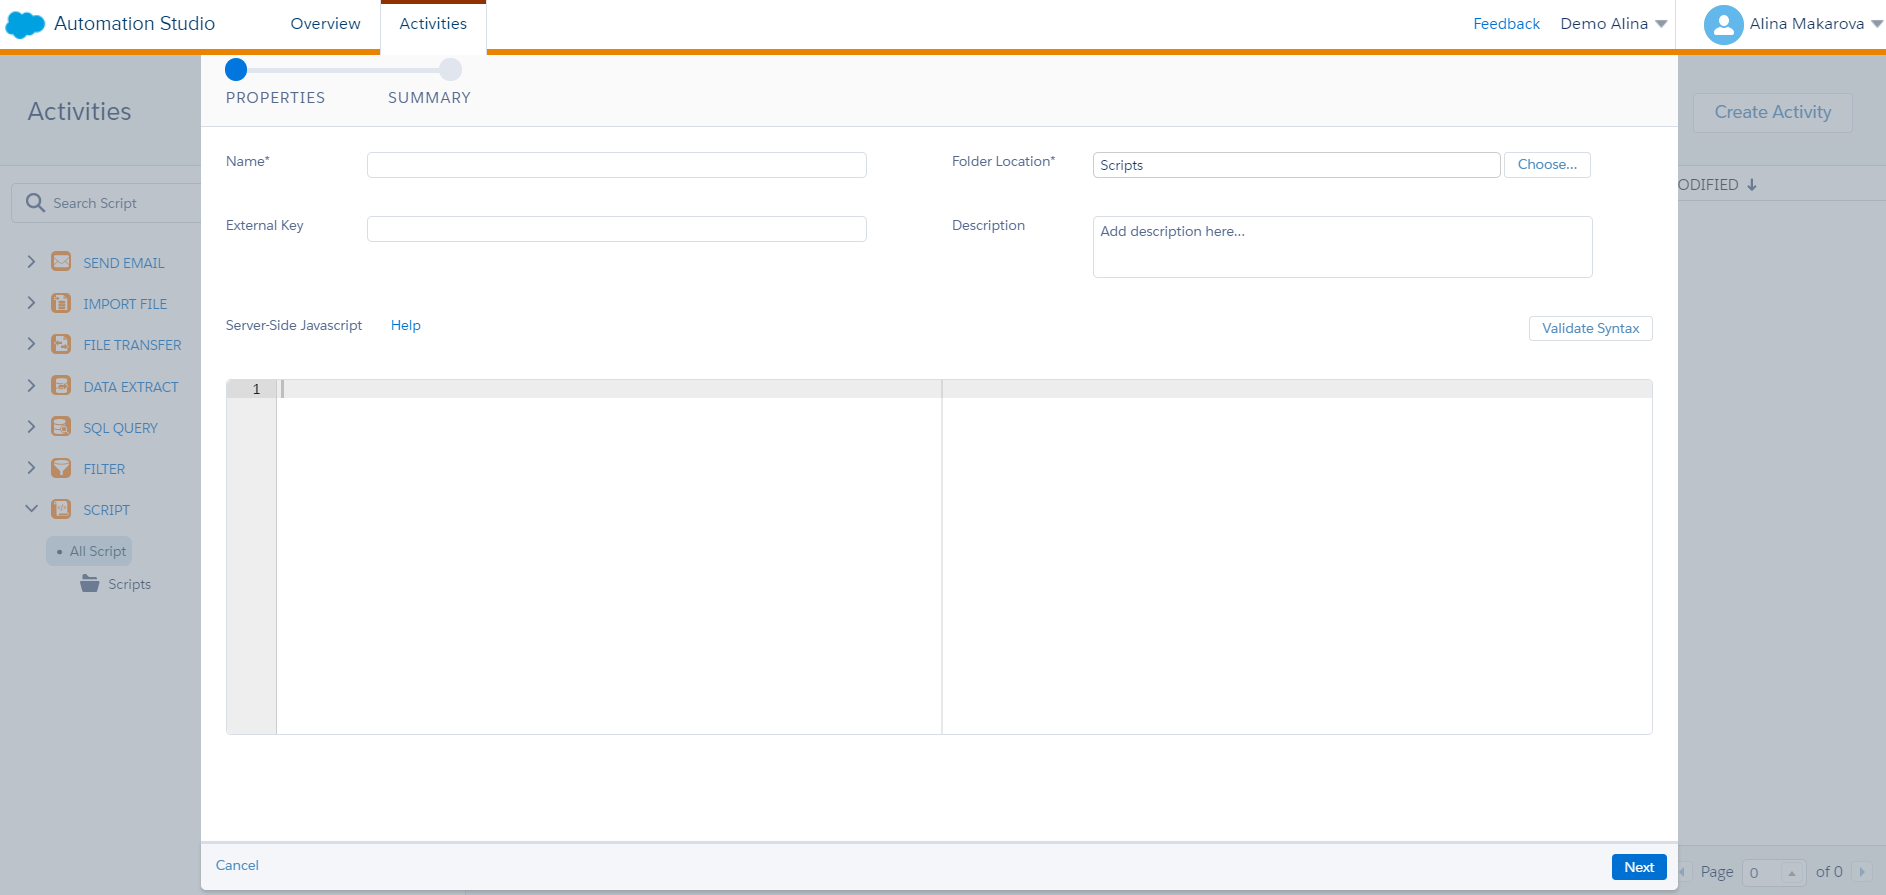
Script Activity
Data Extract Activity
As you can see from the activities we’ve already covered, Automation Studio is an app for technical marketers, and the next activity isn’t an exception. You need to use data extracts to export certain important marketing events such as bounces, clicks, conversions, etc. data extract creates a file to operate outside of Salesforce Marketing Cloud. You can also use this activity to extract data from data extensions or data views. For instance, if you prepare reports outside of Marketing Cloud, you can leverage data extracts and download them on your desktop. Then you can use Excel or any other tool you use for managing data and analyze it there.
Firstly, to use data extracts, you have to configure where this data extract will be saved. Since most Marketing Cloud clients handle massive amounts of data, you can’t download the files directly on their desktop. You need to create an FTP user for privacy reasons and to be able to extract large files with data. That’s why you need to configure a File Transfer Location, and you have to specify it under your account settings before using data extract activity. There, under Data Management, you have to create an FTP user.
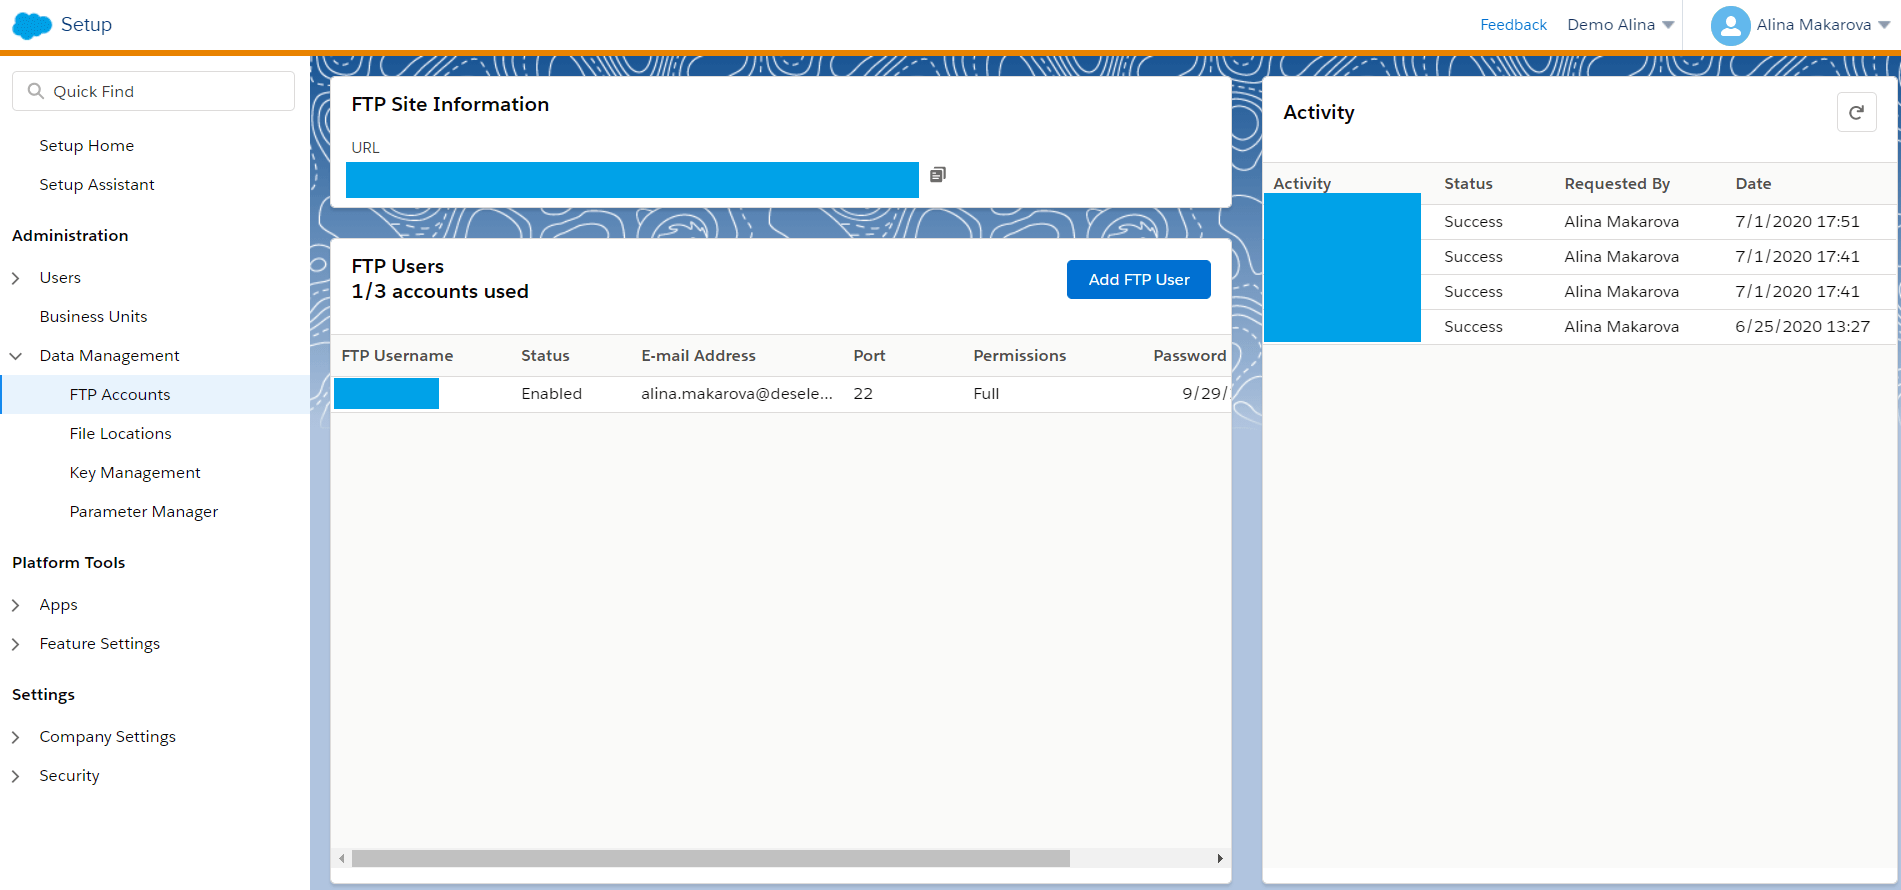
How to set up an FTP in Salesforce Marketing Cloud
The advice for using the data extract activity is to include the file transfer activity in a separate step and not stacking it in the same step on the automation canvas. This action prevents the file transfer activity from looking for the data extract file before the data extract is complete.
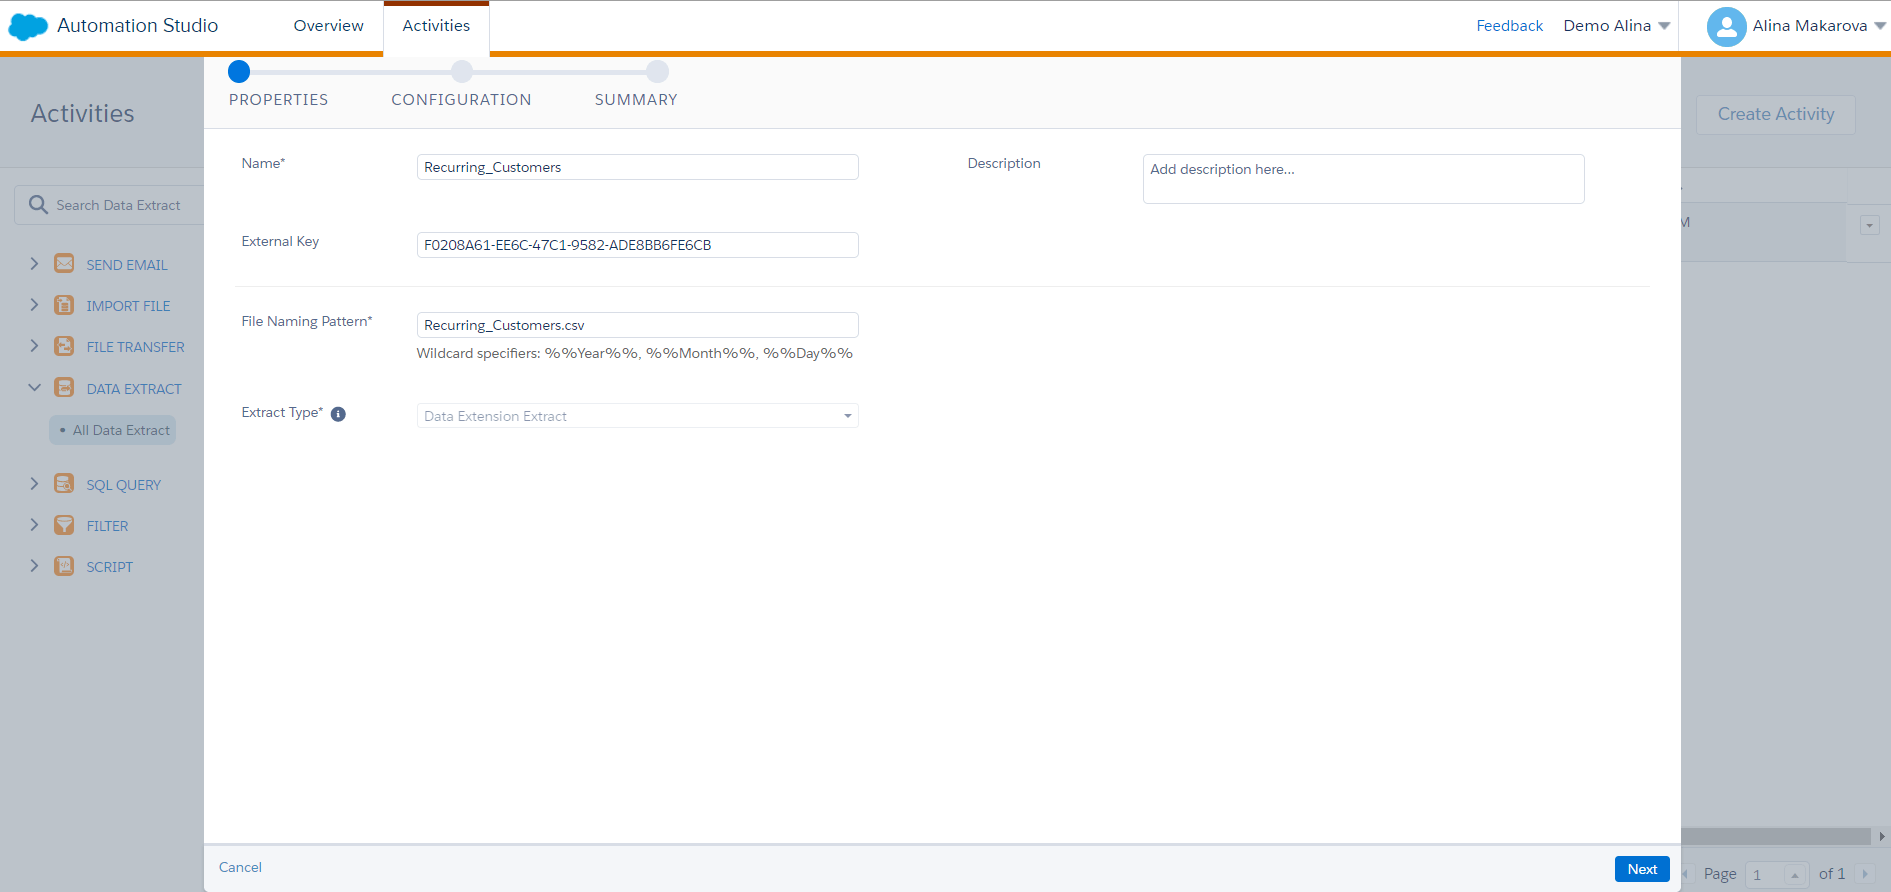
When creating a data extract activity, remember to fill in an appropriate file naming pattern, where you need to specify the file type, for instance, ‘.csv.’ That enables you to later use the extracted document in Excel, for example. You can also convert activity to an XML file, tab-delimited, or pipe-delimited file for import into your account.
In our extensive guide on Automation Studio, we show a use case that includes creating a data extract activity.
Data Extract Activity
Verification Activity
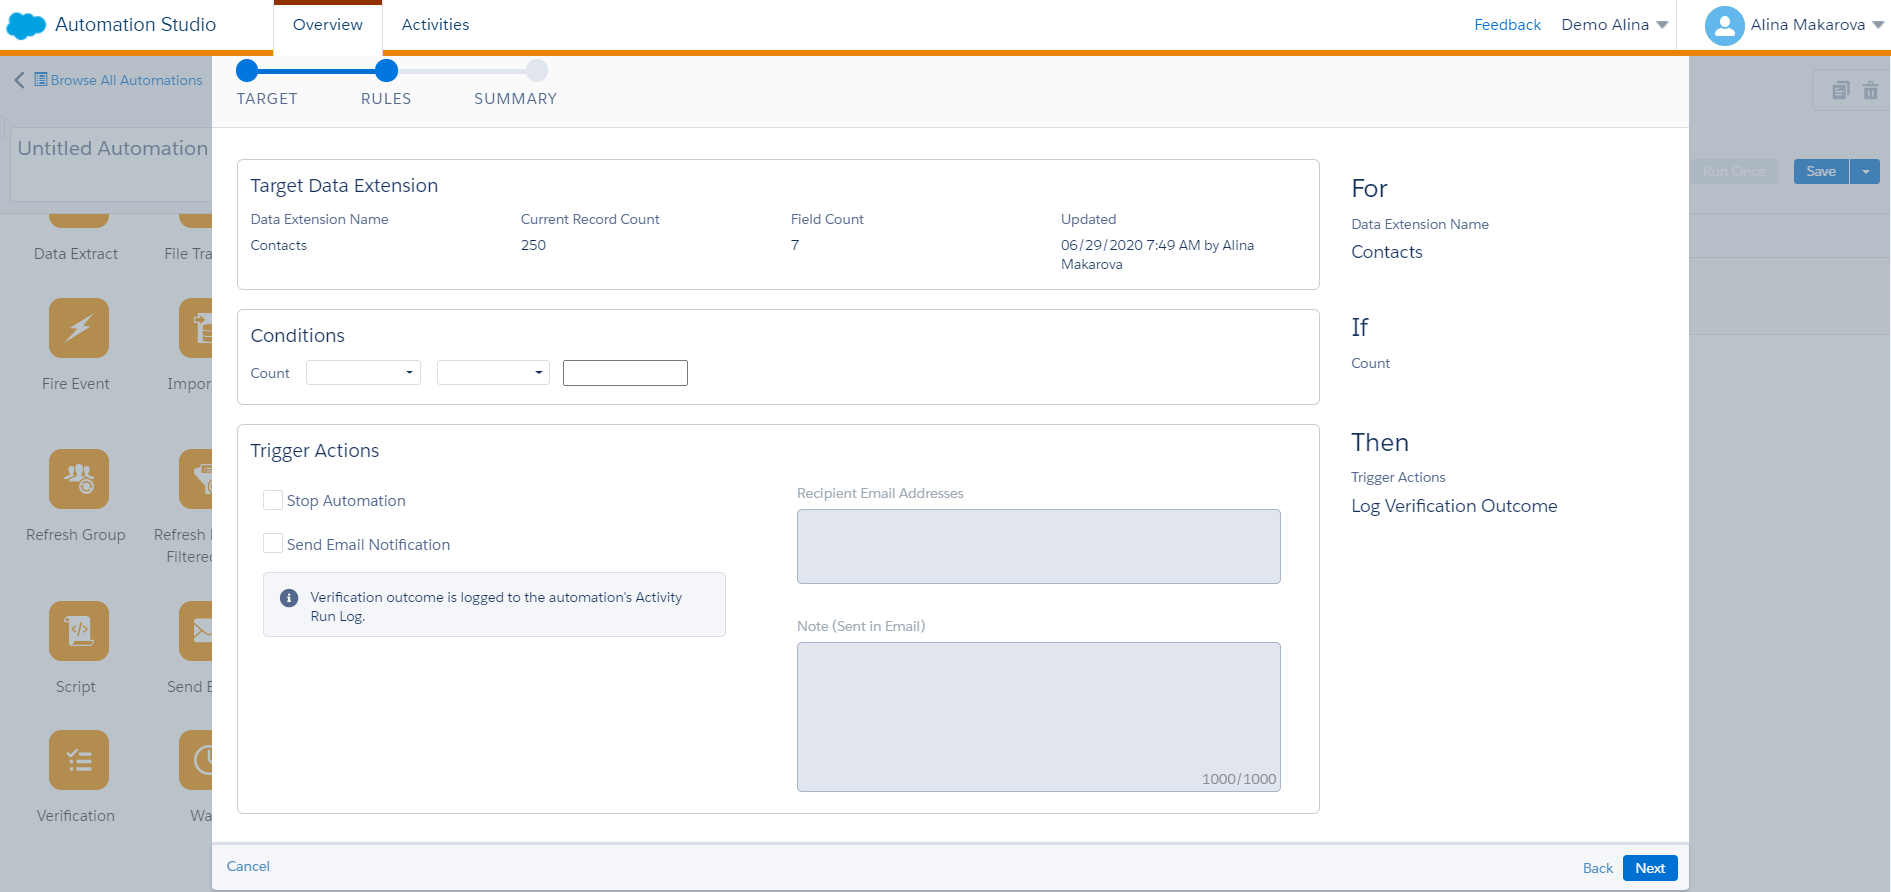
This activity you need to use for precaution reasons to avoid unintended automation outcomes. The action lets you select a target data extension in your automation and evaluate the target data extension for conditions you set. For instance, you can use this activity to track why the target data extension contains more records than expected. Using this step in the automation will prevent the email sends to the records that aren’t supposed to receive it.
When the activity detects that the conditions you have set are met, the activity can stop the automation or send you an email notification or both, depending on the actions you define. If you choose to receive a notification when the conditions are met, you can include a note in the email to provide more context for investigation or troubleshooting.
There are a few things to keep in mind when using this activity. You can only use it in particular automation and can’t reuse it across multiple automations compared to many other reusable automation activities. You can’t configure a verification activity outside automation. However, it’s possible to add various verification activities in a single step, but don’t place them in the same step as any other activity on the automation studio canvas; it’s better to add it in the separate one.
Verification Activity
Wait Activity
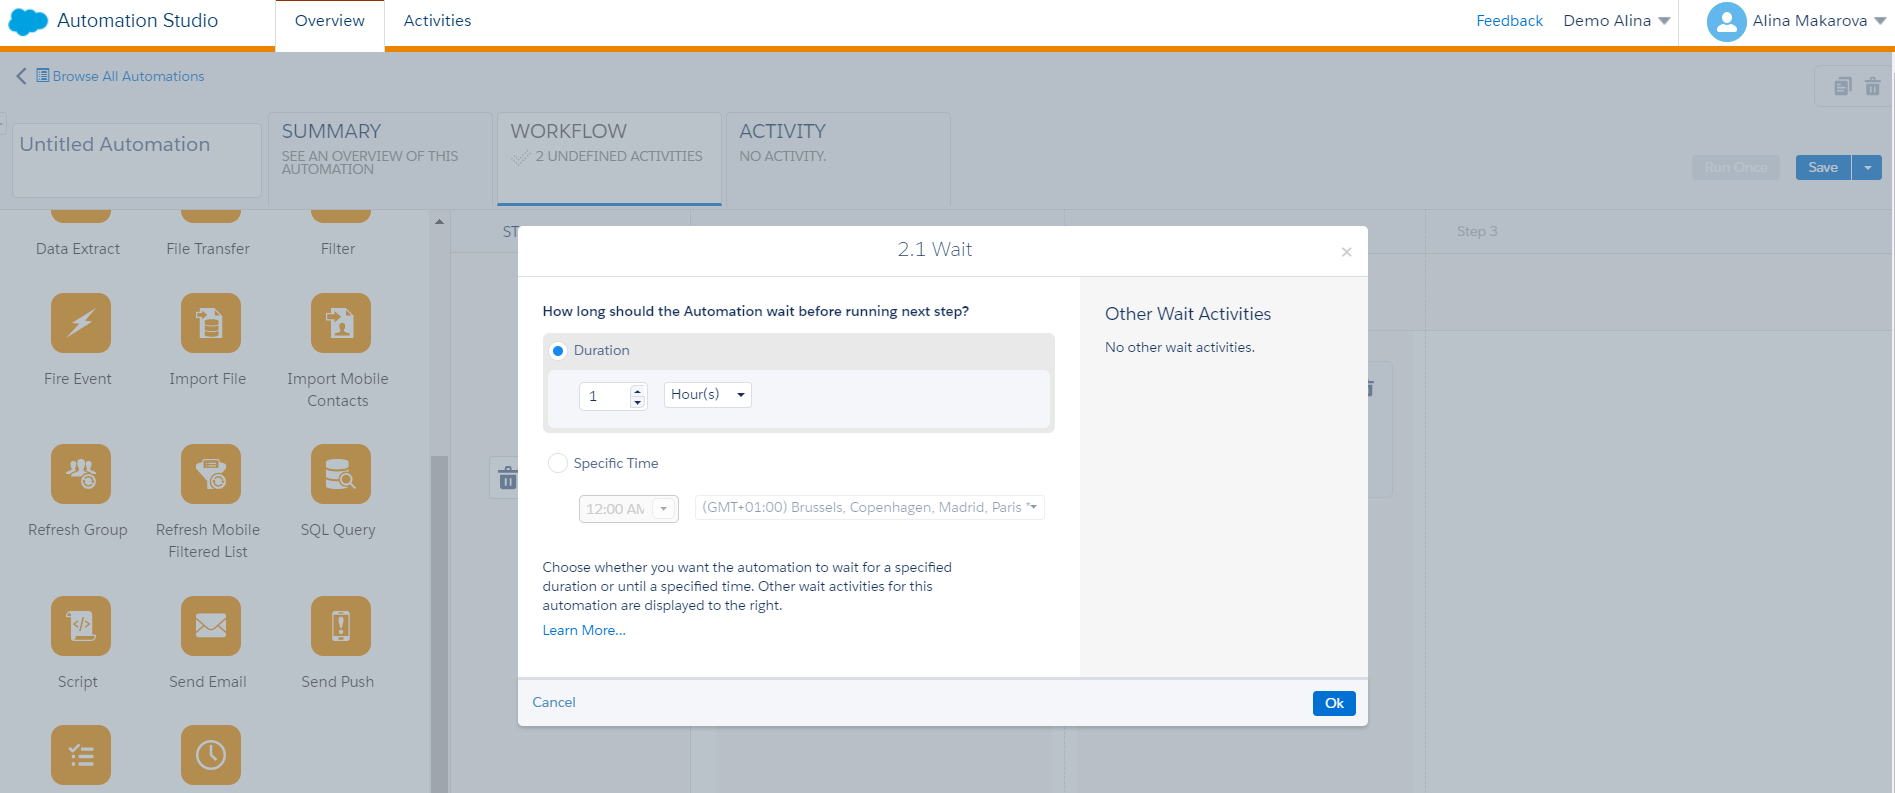
If you want to have a pause between activities in Automation Studio, you can use the wait activity. You use it to wait for a specific duration or until a particular time before performing the next step. There’s no limit of wait activities you can include in single automation.
However, there are considerations to be aware of when using this activity. For example, even though there’s no limit to the number of wait activities to add to the automation, the combined time limit for them cannot be more than one year. To avoid that, you can see wait times for previous wait activities and calculate the total wait time in the automation.
If you specify the duration of the first wait activity, any wait activities occurring later in the automation’s workflow begin after this wait time ends.
Lastly, when automation is in the middle of a wait activity, that run is skipped when the next scheduled or triggered run occurs. To avoid errors with the automations, pay attention to adding the wait activities to avoid conflict.
Wait Activity
Conclusion
It can’t be stressed enough that with great power comes great responsibility, and Automation Studio is a perfect example of that. This Salesforce Marketing Cloud studio is a great tool to use if you want to automate the data-related activities in the platform and perform technical marketing tasks. However, you need to choose carefully whom you give access to this tool, and we recommend limiting access to it as much as possible. Suppose you still want marketers to have the power to schedule specific campaigns and create advanced segments based on the data you have in Salesforce Marketing Cloud — leverage this functionality in DESelect Segment. To use these functionalities in the DESelect Segment, a marketer doesn’t need access to Automation Studio and data-sensitive information or have technical knowledge of the platform. You can book a call with one of our certified consultants to have a personalized demo of DESelect Segment and find out how it helps you fulfill your data automation needs in Salesforce Marketing Cloud.
- A roundup of data-related activities in SFMC Automation Studio and how to use them
- Email Send Activity
- Script Activity
- Data Extract Activity
- Verification Activity
- Wait Activity
- Conclusion