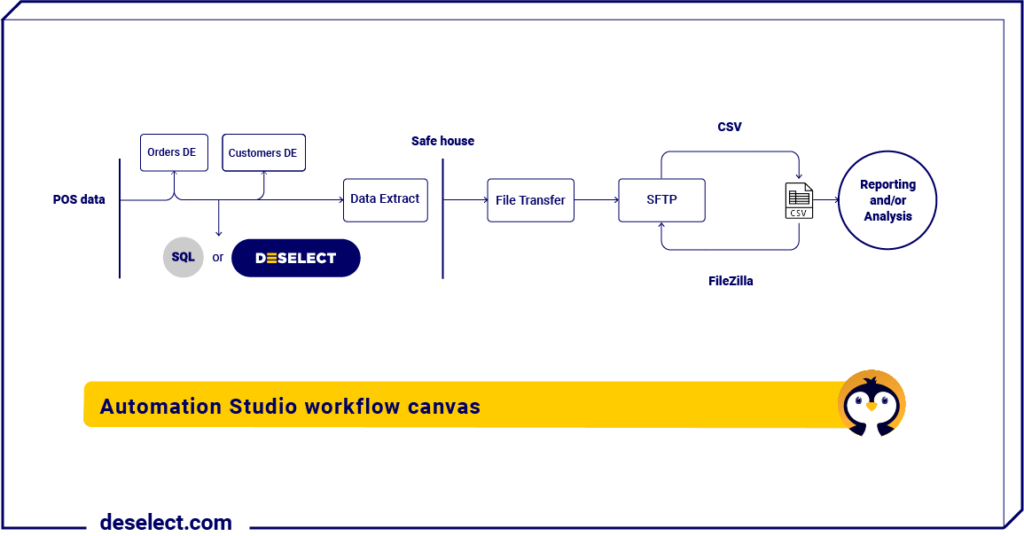
Let’s say you wish to analyze some purchase history information regarding customers who last purchased from you a more than a year ago. You wonder why they’ve stopped buying and suspect they could benefit from a reminder about your goods and services. With Automation Studio, you can create and run an automation to collect the data you need and move it to your desktop. It just takes a few steps:
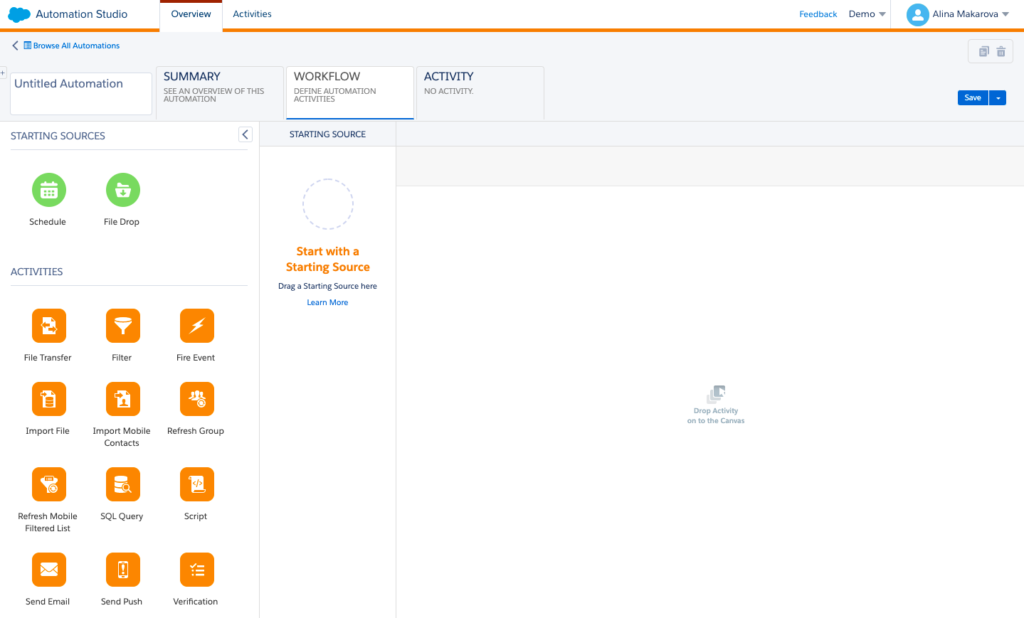
- Choose the Automation Type: Choose a scheduled or triggered automation that suits your needs.
- Select the Starting Source: In this example, your starting source is a scheduled quarterly automation. Select “monthly,” and then select “every three months.” Lastly, choose when you want this automation to end. It’s wise to select “never,” and deactivate it when you’ve collected the information you need.
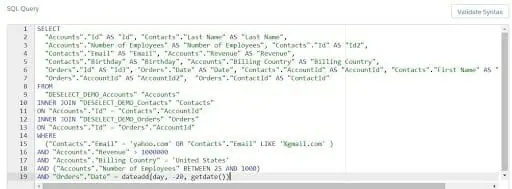
- Add SQL Query Activity: Engage your segmented data with SQL activity (a Structured Query Language crash course will be included below).
- Create an Inner Join: Connect segments, if necessary, into a new automation table. In our example, this is based on Customer ID between the two data extensions, but, in reality, you can have different fields and data extensions.
- Create a Subquery: This will appear within your initial query. It further specifies the information you’re looking for, and you can have several per query. In our example, our subquery is used to detect how often the customer ID appears in the Orders DE.
- Create Data Extract Activity: This creates CSV files ready for transfer from Marketing Cloud and use outside SFMC.
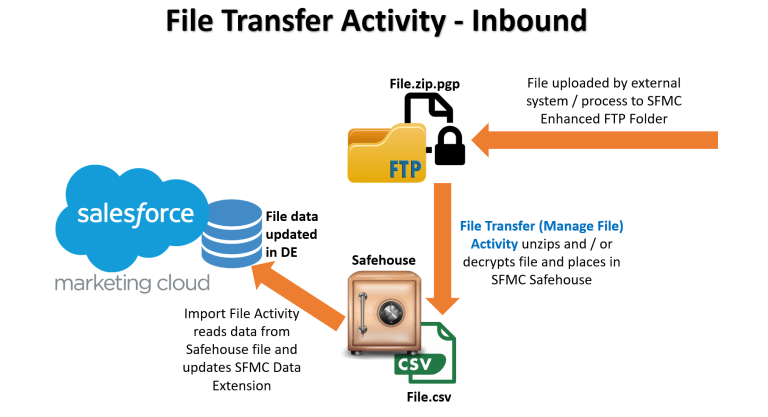
image source: https://tidbitsforu.com/file-transfer-activity/
- Create File Transfer Activity: For our example, our file transfer activity would be classified as “outbound,” as we’re moving information from Salesforce to our desktop. You can also do this in reverse, and classify files as “inbound” when importing to SFMC.
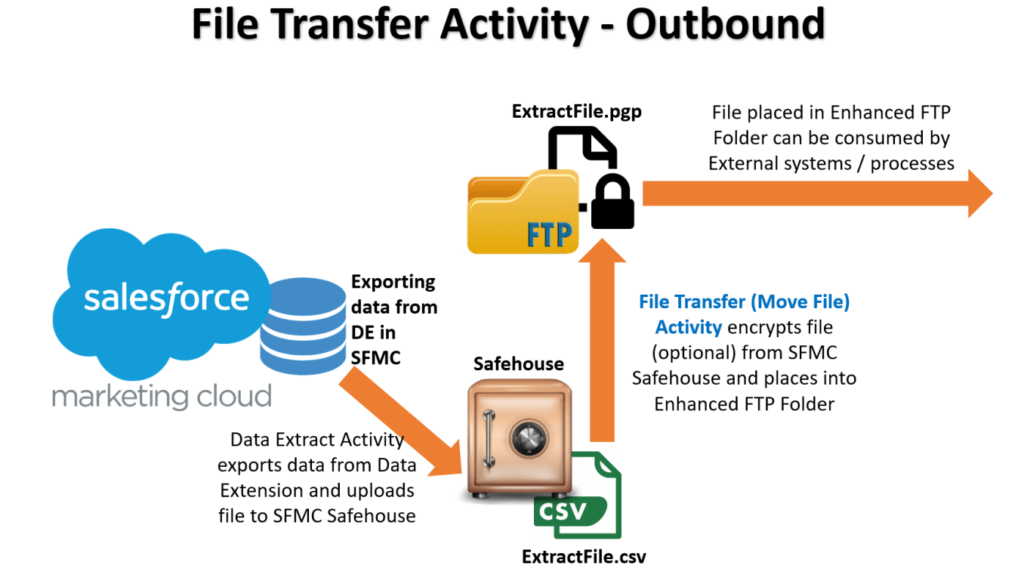
image source: https://tidbitsforu.com/file-transfer-activity/
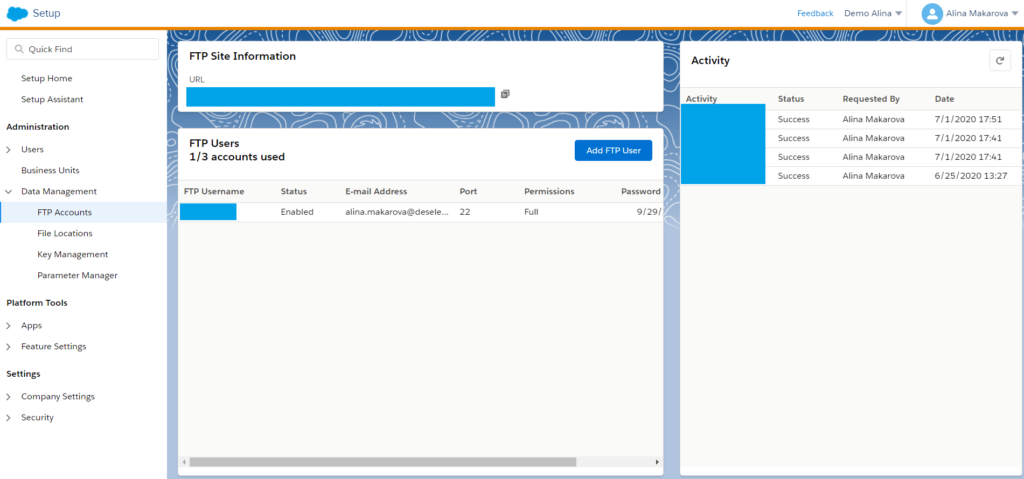
- Connect your Chosen File Transfer Application: Choose and connect the destination for extracted files. In our example, FileZilla is a great option.
- Find the “Import” Folder: This is where your ready-to-use CSV file will be waiting with the full compilation of customers meeting your criteria. The automation will continue until you indicate otherwise.
Running the Automation
After the automation is set up, it must be run. Click on “Run Once,” and choose the steps to run. You can also select the option to run one step of the automation if you want to test only a part of it first.
In the “Activity” tab of your automation, you can opt to receive a notification when your automation has finished or if an error occurred. This ensures you’re kept up to date on your automations and can easily ensure they’re running smoothly.
There are a number of powerful use cases for automations in Automation Studio. If you have an interesting or novel way of using automations, please send us your ideas at [email protected], and we may include your case in one of our next articles.
After watching this video you’re going to find out how to recreate this scenario in Automation Studio in Salesforce Marketing Cloud.